Calibration of loadcell, for dyno running with SportDevices SP1+, SP3, SP4, SP5 and SP6 DAQ units.
Procedure may be different depending on how the dyno is constructed. In this description there is use “calibration bar” and “Calibration weight”.
The purpose of calibrating the load cell is because the load cell normally is the most important factor in HP / TQ calculations in most dyno software.
Brake Torque is converted to linear force into the load cell thanks to balljoints and the physical position of the cell with respect the brake axle (load cell lever). This force is
converted to real-time data. Therefore, it is extremely important to perform this part of the dyno calibration 100% correctly.
An incorrectly calibrated loadcell will give incorrect dyno readings !!
It is recommended to do calibration, on a regular basis. As part of normal service on your dyno.
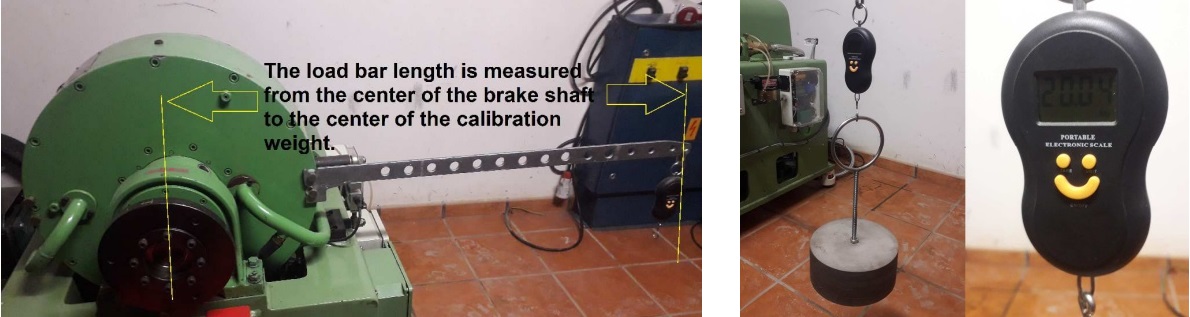
The load bar length is measured from the center of the brake shaft to the center of the calibration weight. The location of the loadcell has no significance with this method. The
software will automatically calculate the correct calibration factor.
A calibration weight is an important tool, and should therefore be stored and treated as an every important measuring tool.
The weight you should choose must be based on what max weight the load cell is nominated for and the length of the bar.
The purpose is to apply so much of the max load to the load cell, to get a better calibration.
Step 1:
Open Loadcell Wizard and mount your cabling bar (Without weight on the bar).
The weight of the bar does not matter at this time. And will be offset at the end of calibration.
Zeroing:
- SP1+, SP5, SP6: The “zero setting” shouldn’t be used with these DAQs. Nevertheless, it is necessary to (re)Start the DAQ to execute the zeroing process cancels the bar’s weight
- SP3 and SP4: As those (old) DAQs do not perform the internal zeroing at startup, thus it is necessary to use the “Set to Zero” button.
Step 2:
Enter the Cabling bar length value (say 270 mm) and the calibration weight value (say 20 kg)
The next step is to place your calibrating weight on the bar. And then press “Calibration”
After the calibration the calibration weight and bar must be removed and the zero performed again:
- SP1+, SP5, SP6: restart the DAQ so the new (negative) offset is cancelled.
- SP3 and SP4: go back to “Step 1” and press “Set to Zero” again. This makes the offset for the calibration bar weight.
Go back to Step 2 and press “Ok”, calibration is now complete and stored on your computer
Alternative Calibration Methods (Depends on the dyno)
Some dynamometers can have a dedicated place at the same position that the load cell to perform the calibration directly over the cell. In these cases, the calibration bar length is the same than the load cell lever. If load cell lever (distance from axle to cell is 300 mm, calibration bar = 300 mm)
These methods have the advantage that do not use a physical calibration bar that adds a weight when installed in the brake (and subtract a weight offset when removed from the brake)